How to do it step by step
1st Step:
What do we want to address and why?
Given the wide variety of global issues covered by the SDGs, we needed to carefully consider what we wanted to address and how we wanted to do it. This should take into account the type of permanent collection held by the museum, the profile of its visitors and the range of possible activities. Discussing these issues with the museum’s team enabled us to collect a set of opinions that were useful when it came to designing the installation.
2nd Step:
Location
Once you have decided on the subject, it is necessary to consider the installation’s location. You should aim for a location where the connection to the theme is immediately evident to maximise the installation’s impact. You should also take into account the size of the installation and the need to ensure that it does not hinder visitors’ access.
→ Note: in the case of this topic (food) you should consider using the museum’s cafeteria, since cafeterias tend to have high footfalls.
3rd Step:
Get to work
Once you have decided on the subject and the location, you need to consider what materials are needed to implement your concept. Check prices, suppliers and, in the case of creative content, ensure you obtain the required authorizations for the use of images. At this stage, it is important to identify a supplier who can meet your design requirements and printing needs.
4th Step:
Schedule
Once you have formed your extended team (including service providers), you should draw up a realistic implementation schedule, factoring in the individual schedules of everyone involved. Take into account the fact that, ideally, you should have the installation ready to launch on a symbolic date (for example, one of the international days such as the International Day for the Eradication of Poverty or World Food Day).
5th Step:
Materials
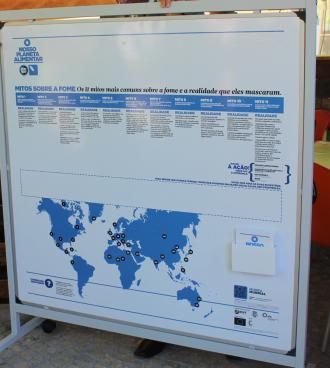
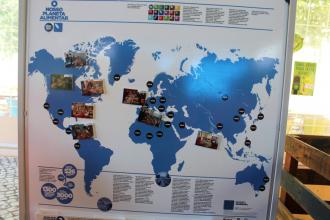
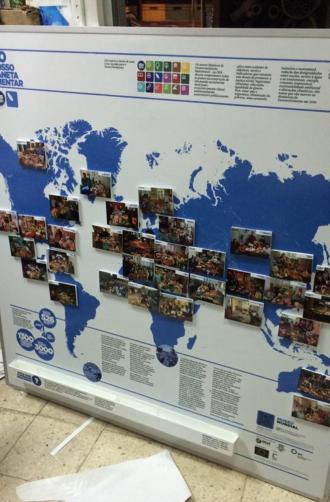
Once work has been awarded to suppliers, you need to work with them to define your precise requirements for the materials. In this case, we needed to define our requirements for the design and printing of the supporting graphic materials, the mobile metallic structure where the world
map would be placed and the magnets for attaching the photographs. To avoid overloading the structure with information, it is advisable to add a leaflet where the visitor can read more about the topic. The leaflet should include the following aspects: context; facts and figures; additional information; a call to action; the link between the museum and the SDGs; and some more photos.
6th Step:
All we want to say and do
What to say: the message should be clear, brief and accurate. Pictures are worth a thousand words, so focus on the visuals to introduce the visitor to different opinions. In this case, since we were familiar with the work of Peter Menzel, we already knew the type of approach we were going to implement with the photographs.
→ Note: You must request permission to use these photos.
Research: in order to have accurate data, it is necessary to carry out research on the websites of institutions known for their level of expertise and scientific research. For this particular topic, the latest reports from certain organizations, particularly the Food and Agriculture Organization (FAO) and the World Food Programme, should be read.
→ Note: data must be as up-to-date and accurate as possible since unreliable information undermines the credibility of the entire installation.
Writing: once you have collected all this information, you need to write the message for the installation itself and for the accompanying sheet/leaflet. The information should be distinctive and presented in a language that is accessible to all audiences.
7th Step:
Approval
The sheet/leaflet/brochure: The support material is critical to ensuring that visitors reflect on the topic and analyse the information transmitted. In this case, the message was clear and well-supported by evidence and figures. For the list of websites recommended in the sheet/leaflet we opted for those with clear calls to action for visitors. The mobilization of citizens for social justice is a common goal and, as such, should be encouraged. We chose an international, a national and a local website, thereby ensuring that we covered the glocal dimension (global + local). The sheet/leaflet/brochure should have a strong visual link to the topic under discussion. It was approved by the team and sent for printing (2000 copies).
Signpost: it is essential to create a signpost for the installation, alerting the visitor to the presence of something innovative in the room. It was produced and attached to the wall.
Plan: All museums have a map at their entrance, indicating the rooms and their respective exhibitions. So, we decided to create a Museo Mundial welcome map identifying the project installations.
→ Note: since it is a time-consuming process that also has an impact on the environment, the best option is to wait until all installations are in place before printing the map. This reduces costs and the impact on the environment. Throughout this process, it is essential to ensure that museum staff agree to everything written on all the support materials. Furthermore, it is vital to ensure consistency between graphic materials in terms of colour, font and the tone of the written message.
8th Step:
Installing it in the museum
Once all the material is printed and everything is ready, you must identify an appropriate date for an official inauguration. On the day itself, remember to record the event through photos and/or video and ensure that the room and the installation complement each other.
In our case, the installation is installed in the museum’s cafeteria in the form of a mobile structure with two faces (120 x 150 cm).
Why the museum cafeteria?
It is a place visited by many people who do not access the exhibition rooms so often. In this way, we could increase the reach of the awareness campaign.
→ Note: to use space leased to third parties, as in the case of this cafeteria, you must seek authorization from the respective management in advance.
9th Step:
Communication plan
As the project seeks to attract the highest possible number of visitors, a communication plan was developed in support of the project and each installation in particular. We identified key institutions to contact, communication channels to use and the type of message we wanted to convey.
So, during the days leading up to the installation’s inauguration, a Facebook event and an introductory teaser were created.
Facebook Connected for a Better World: given its very high reach in Portugal, Facebook is an excellent communication tool. Therefore, and based on the information collected and research conducted previously, it was possible to create in advance a post to feed the Project’s Facebook page.
Media: it is crucial to understand the installation’s impact on the media agenda. Nevertheless, it is still important to issue press releases, particularly to the local media.
Flashmail: to increase publicity about the installation, we created a flashmail containing the poster image, a brief message and a summary about the project and its financial supporters.
10th Step:
Inauguration of the installation
Invitation: ensure you meet with partners to coordinate the invitations and the list of attendees for the installation’s inauguration ceremony. You should photograph the event and, if possible, get some statements and/or interviews.
11th Step:
Promotion
On the day of inauguration and over the following weeks, posts and photos alluding to the SDGs were posted on Facebook.
The installation’s inauguration should be publicised using all channels available to your partners, including international networks and partnerships


