How to do it step by step
1st Step:
Choose object and topic
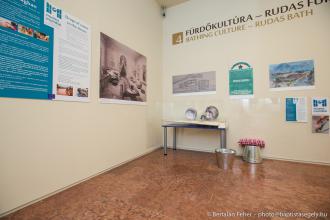
Water was already a prominent theme within the Budapest History Museum, since one of the recently refurbished permanent exhibitions on the history of Budapest displays the tradition of water cures in Turkish baths in Budapest. Basically, these exhibits cover the whole topic in one room, by displaying how it has evolved over various centuries. This explains why fragments from Turkish bath tubs are found next to swimsuits from the 20th century in this exhibition. Moreover, there is a poster that declares that ‘in the past only the rich had the opportunity to go to the baths, but from now on the public baths are open to everyone’. Therefore, the availability of clean water in different parts of the world fitted in well with this exhibition.
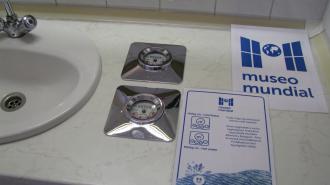
In addition, we wanted to surprise visitors by engaging with them in a place where they would least expect it. This is why we chose the restrooms to install water meters on both the taps and the toilet cisterns.
2nd Step:
Check technical requirements
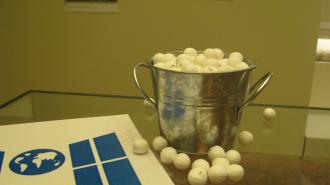
We needed to find sites within the permanent exhibitions to install the tools and the room we chose proved adequate for this purpose. We wanted to symbolize water drops through the use of little balls filling up the buckets. However, we could not use glass balls as they would have shattered on the marble floor of the exhibition. They could not be too small either, so as to avoid them being swallowed by children standing next to the table. We considered Plexiglas because it appeared to be the most translucent material available and, therefore, suitable for symbolizing water. However, eventually, we decided on paper balls because they were the right size and were affordable.
3rd Step:
Quotes
To create this installation, we needed not only graphic designers but also an interior architect or installation designer to develop the Plexiglas table. If there is a partner available with whom you are used to working, or perhaps even the one who created the permanent exhibition, that would be the easiest solution. The design process is not cheap and prices can vary widely. Besides, the cheapest option is not necessarily the best option.
Further aspects to consider are the materials and assembling the installation. In our case, we could not find a water meter that displayed water consumption clearly enough, so we had to choose carefully explanatory diagrams instead of it.
4th Step:
Create content
One of the main aims determining the choice of content was that it should grab the visitor’s attention. This led to content being placed in the restrooms. In the spa culture section, the main determining factor in the choice of content was the need to explain to visitors why they should pay attention to this issue and how it works in other places and countries. So, our goal was to answer these kinds of questions that visitors were likely to raise. According to feedback, visitors particularly welcome the advice given in the installation on how water consumption can be reduced.
5th Step:
Final corrections
When we want to explain more serious content through short texts, it is worth asking outsiders to check the message and give their opinions on it. A simple but clear message will have the greatest impact.
6th Step:
Installing it in the museum
In a museum, it may be that an installation like this split between two locations cannot be completed on the one day of the week when the museum is closed. Therefore, it is advisable to schedule the installation process in a way that minimizes any inconvenience and confusion that might be caused to visitors by the presence of a semi-finished item for a few days.
7th Step:
Maintenance
The installation and its surrounding area should be constantly checked because people like to write or draw on the walls.


