How to do it step by step
1st Step:
Initial orientation
Visit the museum you will be working with and get an overview of the exhibition.
2nd Step:
Content selection
Conjointly choose the object and topic you want to work with. For the topic of migration, there are many objects that can provide a starting point. Thematic areas within the museum that could be connected to this development topic include human prehistory, as in our case, political conflicts, slavery, civil wars, trade and work.
Try to create a comprehensible and clear connection to existing objects.
→ Try to stick as closely as possible to the thematic focus of the object you want to work with. Make connections to the region, the actors involved and the style of storytelling used in the object. In our case, the story that was already present in the Nuremberg museum was the first and second great migration out of Africa. We used this starting point to go on to explain why mankind is still migrating for so many different reasons up until the present day.
Choose an aspect of the topic that is both complex enough and well-defined enough. Do you want to offer an overview of the topic? Would you like to concentrate on a certain part of the story? If so, which part?
→ In our case, we decided to present an overview by displaying a timeline on migration throughout history. At the same time, we give visitors the chance to deepen their knowledge on specific topics of interest by highlighting several points in migration history.
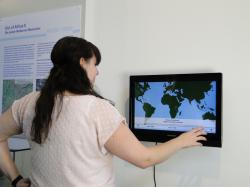
Develop methods to present your idea. The amount of space available may limit your choice of methods. For our installation on migration, we had very little space available in the museum: just one wall. Therefore, the use of a touchscreen seemed an obvious solution.
3rd Step:
Work plan
First draft: If you decide to design a touchscreen, we suggest you build something like a screenplay as a dummy. The screenplay indicates which screen will appear in which order and what should happen when the museum visitor presses each button on the touchscreen. This
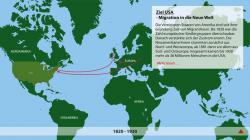
screenplay will thereby naturally lead you to deciding on content. For example, when we were thinking about how to present the topic of migration, the touchscreen gave us the idea of swiping from left to right from one screen to the next to move between different "migration events". So, that was when the idea of presenting migration through highlighting specific migration events throughout history was born.
Your draft should already include a budget plan so that you can assess the feasibility of your idea. It should also include a schedule for the implementation process. Discuss and rework your draft with your partners until you have an agreed version.
4th Step:
Subcontractors
Ask for quotes for every stage of production. Try to get several quotes for each stage so that you can choose the best offer.
Try to get recommendations on subcontractors that have already worked in museums. Add up the quotes, compare the total with your budget plan and adjust it, if necessary.
Essentially, you will need two subcontractors. Firstly, a designer to work out the graphics and, secondly, a media production company to deliver a plug and play touchscreen preloaded with a programme for presenting the graphic material. Sometimes, however, comparing quotes is not that easy. If you are implementing a touchscreen, you will find technical options that differ substantially. In general, there are two types of touchscreens available on the market: touchscreens built for personal use at home that can be adapted for museum use and touchscreens produced for public use at fairs, terminals and so on. The latter are much more expensive than the touchscreens for home use. We, therefore, chose to go with a touchscreen for home use and adapted it for museum use (see 7th step).
Content creation
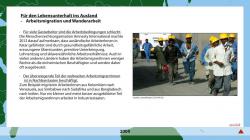
Create and write down the content on migratory movements for the information boxes. Ask your partners to proofread this first version so that you can clarify any misunderstandings at an early stage.
6th Step:
Graphic material and design of the maps
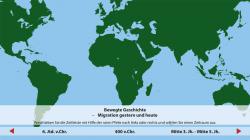
Choose a suitable world map that your graphic designers can use to customize the required areas of the map in a consistent design. When choosing the world map, you might want to consider which format to use. We chose the Mercator map of the world because visitors are used to its design. However it does not factor in the curvature of the earth and how this alters the proportions of the continents. The Winkel Projection or Peters Projection replicate the actual proportions of the continents more accurately. This can be very interesting for the visitor to see as well.
Choose pictures that reinforce the content. Ask the copyright owners if you can use their material for free for educational purposes. In some cases, you might have to pay for the use of this material.
Instruct a designer to create the required sections of the map. Specify the exact sections and labels you need. Bear in mind that the borders between countries might have looked different at the time of the relevant migratory movements and ask the designer to adapt the maps accordingly.
Correction loops: Several correction cycles will make the final product look more professional. Ask the designer for two or three checks.
→ Identify the representatives from the museum that need to give their blessing to the final product. Try to ensure the circle is sufficiently representative of all interests, whilst limiting its size to save time. Make the correction process transparent to all actors involved.
7th Step:
Programming the computer to display the migratory movements and information boxes
Instruct a software developer to programme the computer to display the timeline, migratory movements and information boxes on the existing maps. It is best to work with drawings. That way the designer will have the same idea of the end product as you.
Also, it is useful to clarify how the computer will be used in the museum. Important questions are for example: how will the computer be turned on and off? How will visitors be prevented from turning it off? What happens when the power is shut off (which is the case in many museums after closing time)? Will the computer then restart automatically in the morning when the museum power comes on?
→ Ask the software developer whether subsequent modifications are possible. In our case, the programmer can accommodate any change requests via a download. This way we can easily import any changes or updates to the installation by USBstick.
8th Step:
Installing the object in the museum
The final product must be transported to the museum. Ask a technician in the museum to fix the screen firmly. Check that the screen is accessible for maintenance but not open to interference by visitors. If this cannot be achieved by deactivating certain buttons on the computer, a frame can be built to prevent visitors from accessing the computer to interfere with the controls.
→ Modelling a test version of the whole installation was not possible in our case. However, it is very important to check the height of the screen. If it is at eye level, this provides visitors with the best view. However, will visitors in wheelchairs still be able to see and touch the screen properly? Find a compromise.


