How to do it step by step
1st Step:
Choose object and topic
Conjointly choose the object and topic you want to work with. Objects that could be connected to the topic of trade include ancient (traded) products, containers used for transporting goods such as bottles or pots, old maps, and ancient vehicles.
→ Try to stick as closely as possible to the thematic focus of the object you want to work with. Make connections to the region, the actors involved and the style of storytelling used in the object. In our case for example, we decided to integrate the ancient "incense road" into the installation. In addition, we displayed trade goods from the incense road for visitors to handle in the same way (and using the same boxes) as the modern trade goods.
Choose an aspect of the topic that is both complex enough and well defined enough. Do you want to provide an overview of trade in general or show a specific aspect of trade? We wanted to show the interrelationship between transport costs (high in the past, low today) and the quantity
of global goods present in our everyday lives (few in the past, a lot today), as well as the responsibility for fair trade that falls to us as consumers given the stronger trade links of today.
Of course, there are many other aspects of trade that could be highlighted. Interesting approaches include the consequences of trade for the local community, the beginning of the fair trade initiative, the fair trade system today and its positive consequences for farmers, the scale of trade in ancient times and today, the power of big enterprises, and the subject of customs duty, subsidies and agreements like the Transatlantic Trade and Investment Partnership (TTIP).
One constraint on your choice of topic might be how much space you have available in the museum. Before deciding on your topic, you should also check what technical facilities the museum has available since this may also determine whether or not your ideas are viable.
→ Think small, start small. During the implementation process, new ideas will arise, so be sure to hold back some money for investing later!
2nd Step:
Develop a first draft
Develop a first draft for the whole installation, including the position and content of information panels and boxes. In our case, we faced the choice between putting the ancient trade topic and modern trade topic on one combined information panel or on two separate information panels. We decided to go for two separate panels because this enables the content on modern trade to be updated in the future without the need to reprint information on the ancient trade topic (which will not get out of date so quickly).
When it comes to woodwork, try to provide precise measurements at the draft stage as this will condition the quotes provided by the carpenters. The measurements for the boxes provided in the draft determine the choice of material depending on shape and stability of the boxes. This changes the prices.
3rd Step:
Quotes
Ask for quotes for every stage of production. If you want to replicate this installation, you will need a carpenter, a designer and a printer.
As regards the carpenter, try to discuss all questions relating to functionality before obtaining the quote. For example, one question that arose from our draft was how the lids of the boxes would stay open and not fall on the hands of visitors when they reach into the boxes. Different carpenters proposed different solutions, which resulted in differing quotes.
4th Step:
Create content
Compose and write down the content for the information panels, your maps and the olfactory boxes. Ask your partners to proofread this first version so that you can clarify any misunderstandings at an early stage. Pay for a professional proofreader if you included this in your budget plan. Texts used in this installation should be kept brief since they are competing with the olfactory boxes for visitors' attention.
Choose pictures, graphics and products that reinforce the content. Ask the copyright owners if you can use their material for educational purposes. In some cases, you might have to pay to use this material. However, we also received a lot of free photos on trade products directly from fair trade import companies.
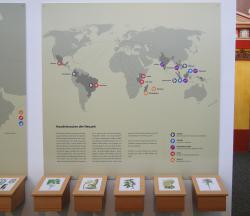
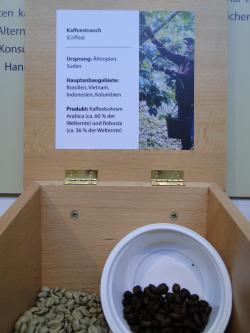
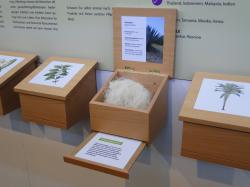
As regards the choice of trade products for the olfactory boxes, there are practically no limits. The only important thing is to choose materials for handling that do not stain. In our installation, we selected some everyday products (coffee and vanilla) and some more exotic products (natural rubber and raw palm oil in a glass container).
5th Step:
Send final drafts to subcontractors
Once the texts are ready and the images have been chosen, you can send everything to the designers.
You need to factor in the (substantial) cost of producing maps of the ancient world because (in contrast to maps of the modern world) there is only a limited amount of material available on the internet for free. Most maps of the ancient world need to be paid for or you will need to contract a designer to reproduce them (like we did).
A technical draft of the installation needs to be sent to the carpenter in order to produce the wooden boxes. It is very helpful for the carpenter if the technical draft also includes the graphical layout of the installation. In this way, the carpenter will know where stickers with texts and images will be placed on the boxes and thereby avoid errors when constructing the boxes (for example, putting screws in places where stickers need to be placed later, and so on).
The same goes for the graphic designer, only in reverse, since having the technical draft to hand helps avoid errors in the graphic design of stickers and information panels as it enables the designer to understand the exact size and position of all of the elements in the installation.
6th Step:
Prepare the hands-on material
While subcontractors work on their respective elements of the installation, you can prepare the material for the boxes. Where you look for these will depend on your choice of materials for the boxes. These were our purchasing channels:
Most of the ancient trade products were already stored in the museum, such as frankincense, cinnamon and myrrh.
Fair trade coffee beans and vanilla beans are readily available in most One World Shops and supermarkets nowadays. If you want to make this material more interesting, you can purchase raw coffee fruits or unroasted coffee beans directly from importers. Coffee fruits, however, need to be conserved (e.g. waxed) or they will rot quickly.
Sisal is available from stores online as a raw material.
Raw palm oil can be purchased from One World Shops and Asian shops.
Natural rubber can only be ordered from a few national import companies and it is a wholesale product that only comes in huge packages of a hundred kilos or more. However, we managed to get some free samples by directly contacting the marketing staff of one import company.
7th Step:
Final correction loops
Correction loops: several correction cycles will make the final product more professional. Ask the designer for two or three checks. Try to keep the circle of people giving feedback small to save time while ensuring that the correction process is transparent to all actors involved.
In the case of the carpentry work on the installation, try to carry out a final inspection before the boxes are transported to the museum so that corrections can be made before it is installed. If a personal inspection is not possible, ask the carpenter to send you photos of the boxes before they are transported.
8th Step:
Production and installation in the museum
Once you give the "go-ahead", the designer will send the final design to a print shop and the printed information panels and stickers for the boxes will be sent to the museum. Once the wooden boxes are delivered, the final step is to assemble everything in the museum.


