How to do it step by step
1st Step:
Initial orientation
Visit the museum you will be working with and get an overview of the exhibition.
2nd Step:
Content selection
Conjointly choose the object and topic you want to work with. The form of each tool depends very much on the specific museum you choose and its individual objects. Types of objects that could be connected to this development topic are, as in our case, showcases displaying scenes and objects from the history of slavery. However, a specific product that has been produced through slave labour would be equally valid. Other possible topics are children and work, or agriculture.
Make sure you create a comprehensible and clear connection to the existing objects.
→ Try to stick as closely as possible to the thematic focus of the object you want to work with. Find connections to the region, the actors involved and the style of storytelling used in the object.
Choose an aspect of the topic that is both complex enough and well-defined enough. Do you want to offer an overview or highlight a specific commodity? Would you like to concentrate on a certain part of the story? If so, which part? Another option could be to present a portrait of a person who is a victim of slavery. Bear in mind that there is a connection to us as consumers through products that are manufactured under conditions that are akin to slavery.
Develop interesting methods that can be used to implement your idea. Check how much space will be available at the museum, what technical facilities the museum can offer, which target group you want to address and how much money you have to invest.
→ Think small, start small. During the implementation process, additional ideas will arise, so be prepared to hold back some money for investing later on in the process!
3rd Step:
Work plan
Develop a first draft of your idea, bringing together your ideas with those of your partners. This draft should already include a budget plan so that you can assess the practicability of your idea. It should also include a schedule for the implementation process. Produce a draft everyone agrees with and then send it to all partners.
4th Step:
Subcontractors
Ask for quotes for every stage of production. Try to get several quotes for each stage, so that you will be able to choose the best offer. Try to get recommendations for subcontractors that have already worked in museums. Add up the quotes and compare the total to your budget plan and adjust it, if necessary. Choose your working partners and make appointments for the production. It is advisable for the carpenter to come to the museum and look at the place where the tool is going to be installed. Also bear in mind that you will need electricity, you do not want to leave wire lying around and you will need to have an access hatch for computer maintenance.
→ Installations involving programming and touchscreen applications differ in price considerably. Balance their potential with their durability and price. How many levels do you need? How much animation? How many visitors do you have? How old are they? How long will the application be in place? What kind of computer is suitable for you? Is it possible to deactivate all mechanisms that might endanger the functioning of the tool? How is the computer turned on and off? What happens if the computer freezes? And how is it attached to the wall? This is where the carpenter comes into play.
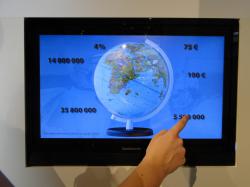
→ Modelling a test version of the whole tool was not possible in our case. However, be sure to check the height of the screen. If it is at eye level, this provides the visitor with the best perspective. But could you still see and touch the screen properly if you sat in a wheelchair? Find a compromise. In our case, that meant 1200 mm from ground level.
5th Step:
Creating content
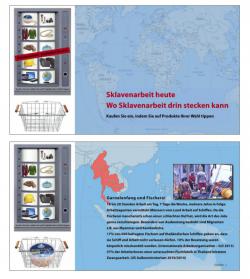
Create and write down the Tableaux content for the touchscreen and the information panel. Ask your partners to proofread this first version so that you can clarify any misunderstandings at an early stage.
6th Step:
Graphics
Choose pictures and graphics that reinforce the content. Ask the copyright owners if you can use their material for educational purposes. We found a lot of interesting photographs on Flickr, as well as on the websites of Fairphone and Terre des Hommes. All organisations were very generous with the sharing of their material. In other cases, you might have to pay to use this material – photographers are freelancers and need an income!
7th Step:
Tableaux design and correction loops
Finalize the Tableaux design you want on your touchscreen.
Correction loops: Several correction cycles will make the final product more professional. Ask the designer for two or three checks.
→ Identify the representatives from the museum that need to give their blessing to the final product. Try to keep the circle small to save time. Make the correction process transparent to all actors involved.
8th Step:
Animation and programming of the all-in-one PC
Send the Tableaux drafts to the computer programmer. She or he will send you screenshots or films of the animation and do another correction loop. Think about how the computer will start. In our case, it boots up when the main electricity supply to the museum is turned on and it shuts down when it is turned off.
9th Step:
Finalizing the carpentry
Take the computer to the carpenter. He or she will have to fix the screen firmly to the installation. Check that the screen is accessible for maintenance, but that visitors cannot interfere with it.
10th Step:
Finalizing the tool and installing it in the museum
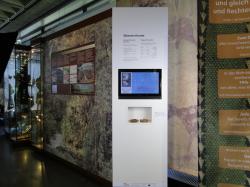
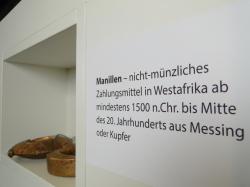
Fix the manillas, or other “hands-on materials” that are available in the museum, in their appropriate place with strong steel-coated wire and make sure that the wire is long enough for visitors to take a close look at the materials. The best choice is self-retracting wire.
Finally, attach the printed foil that displays the title of the tool, some additional information and an explanation on the “hands-on material”.
Fix the "construction" in place. Make sure it does not fall down.


